Free Business Email accounts setup on Google Domains
Without Google Apps / G Suite Subscription
Using Google Domains to get Free Email on your own domain (2018)
Gone are the days, when Google Apps for Work / Business (now known as G Suite) offered FREE services and you could setup your domain emails to work with Google.
But there is a work-around and you can still get Google to use your own domain to create free email accounts which will work just as smooth as Gmail does.
Please follow the instructions below to setup your own domain on Google to get Free Business Email Accounts.
Step 1.
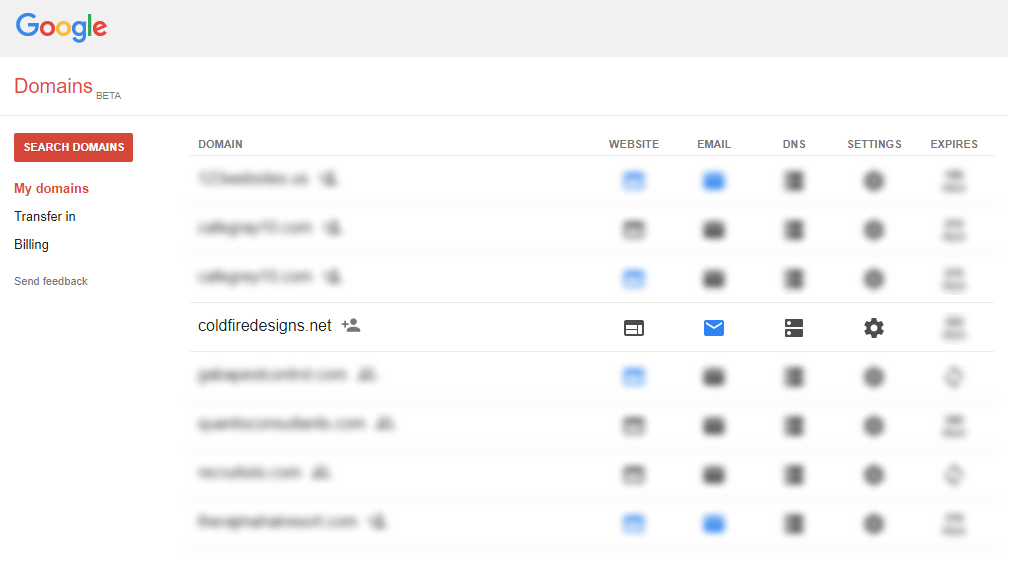
Buy or Register your domain from Google Domains. (Required)
Google Domains URL https://domains.google/
If you have registered your domain name from any other domain registrar, you will need to
Transfer your domain to Google Domains. For transfering your domain to google, please follow this https://support.google.com/domains/answer/3251236
Step 2.
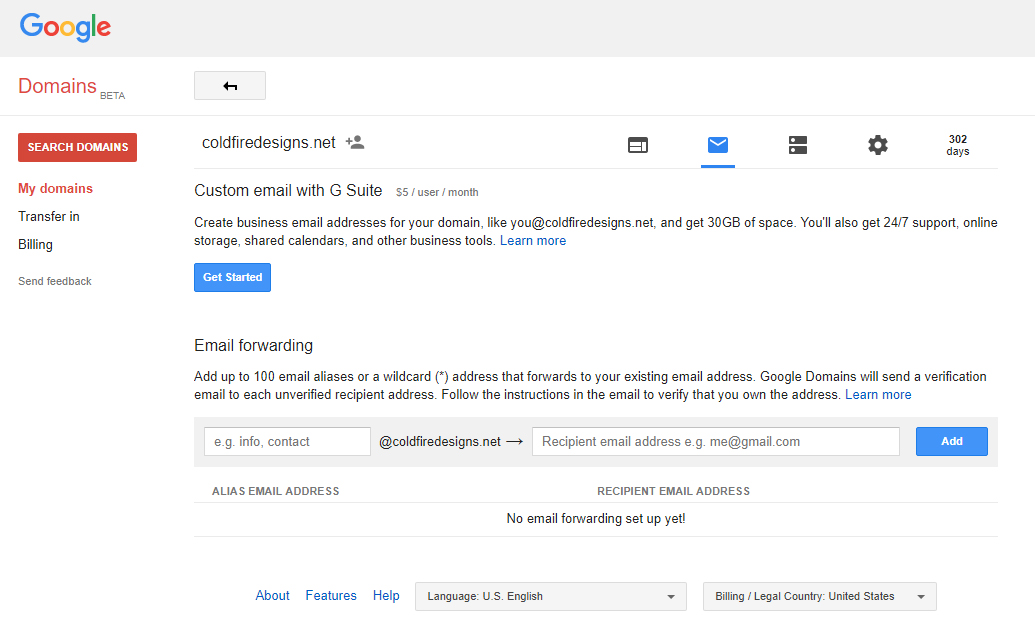
Create Forwarding Email Addresses for your domain
Google Domains give you up to 100 forwarding email accounts which you can create for your domain name once you have your domain setup on Google Domains.
For example:
You registered mydomain.com
You can create [email protected], [email protected] , etc. up to 100 email addresses.
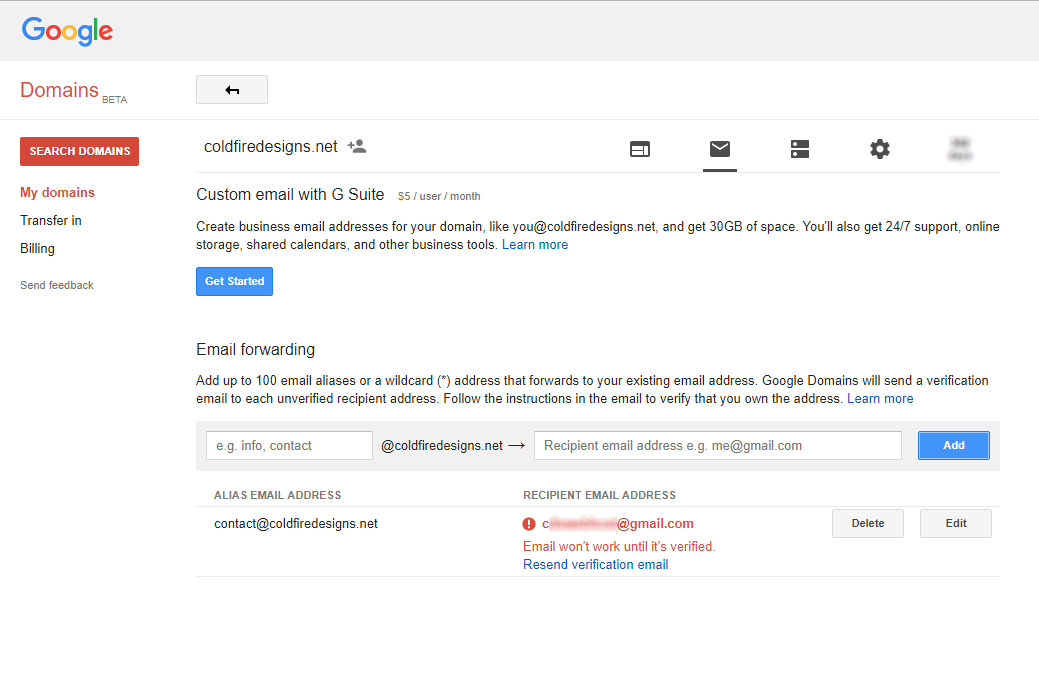
Please note that these are not actual email accounts, these are just forwarding email addresses which will let you create your custom domain emails and are redirected to your existing Gmail account.
You will need to verify the forwarded email account by signing in your existing Gmail account and follow the instruction in the email received.
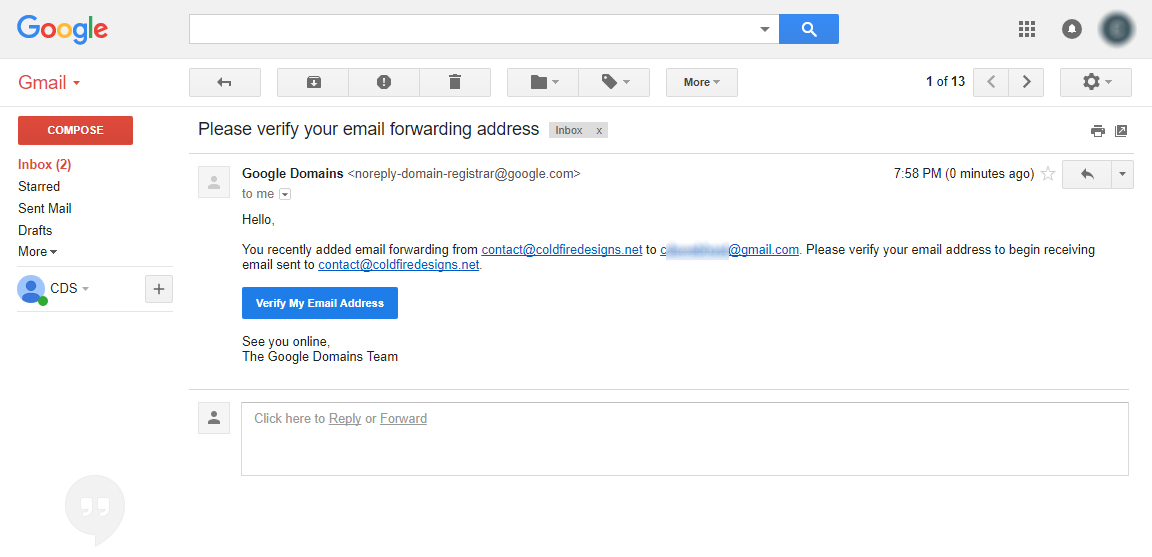
For detailed info on how to create forwarding email accounts, please see this link
https://support.google.com/domains/answer/3251241
Step 3.
Using your custom domain email accounts to send emails.
You have now verified your newly created forwarding email account from Google Domains.
But you know that forwarding email is only one way that is you can only receive emails on this new email account like [email protected] but cannot send any emails from this email address. So, here’s the work-around.
Go to your existing Gmail Account’s Settings (the one which you are forwarding to)
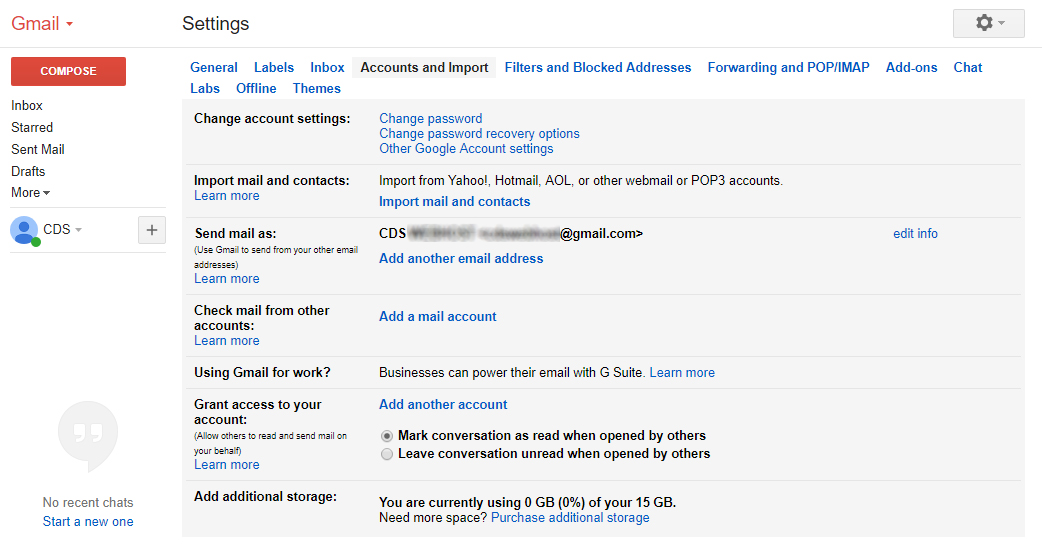
Accounts & Imports > Send mail as > Add another email address
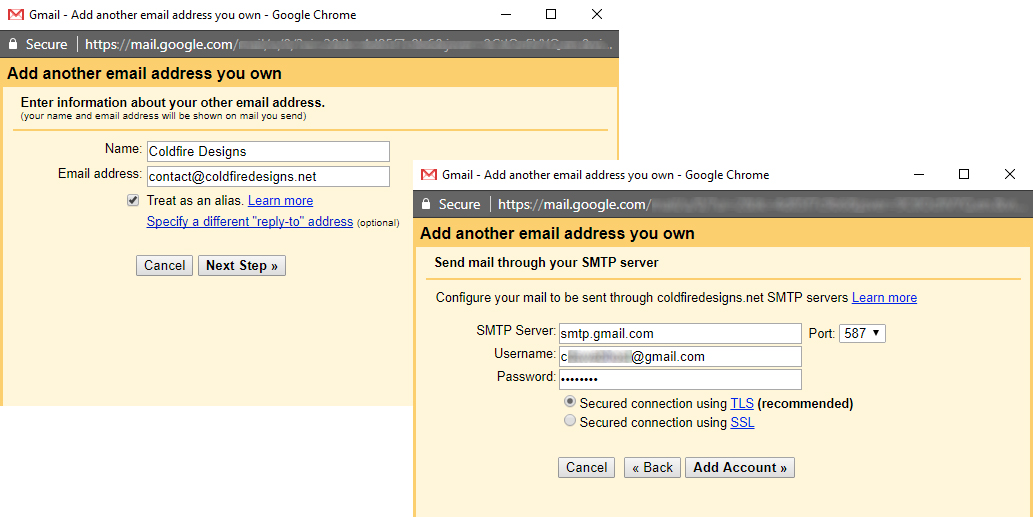
Use Gmail’s SMTP Config as shown in the screenshot above.
SMTP Server: smtp.gmail.com
Username: [email protected] (Your Gmail account with @gmail.com)
Password: Your Gmail account password (Feel secure – you are already on Google)
Secured connection using TLS (Try SSL if doesn’t work for you)
Port: 465 (This is the outgoing port for SMTP)
While signing in, your login attempt might be blocked and
You may need to:
Enable Less Secure Apps https://myaccount.google.com/lesssecureapps
If enabling the less secure apps option doesnt work for you, Generate App Password for your Google Account https://security.google.com/settings/security/apppasswords
This option is available only when 2 Step Verification is enabled for your account
For detailed usage of App Password https://support.google.com/accounts/answer/185833
Once, you are signed in / connected, a verification code will be sent to your new account (which is forwarding to your existing Gmail account), so check your inbox and verify with the code.
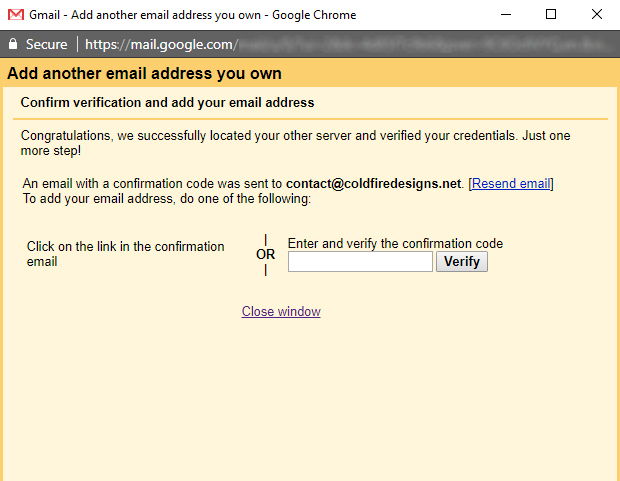
That’s it. You can now send emails with the new business email address [email protected]
Hurray!
PRO TIP
You can create new Gmail accounts like
[email protected] and forward your email for [email protected] to this account.
Under the new Gmail account [email protected] set your forwarded email address “[email protected]” as default sending email account.
Now, you can send and receive emails at [email protected] without any hassle.
Bravo Google! Bravo Gmail!
If this article is not perfectly understandable, read on Google https://support.google.com/domains/answer/3251241
Download a PDF version of this article
Thank you for visiting our blog and we hope this will help you.
Blog Team
Coldfire Design Studio
